Chances are you’ve come across a blog post encouraging you to utilize your church’s Instagram account by posting service times, your latest sermon series, or just showcasing to newcomers what your church is like.
Did you know that Instagram has 800 million active users? And that 350 million images get shared every day on Facebook? This just goes to show how much people love visuals, which is why creating photos with pertinent information is a fun and effective way to promote your upcoming church events and to connect with others over social media.
By creating likeable and shareable photos and memes, your church can have an active online presence and reach people that don't have a church home or that have never gone to church before.
But, what if you don’t know how?
Or, maybe you've thought to yourself, “I would like to take photos and add Bible verses with fancy fonts or cool photo filters but I'm not sure where to start.”
Well, I’m going to show you step-by-step how to take great pictures—and edit them—using only your phone.
We’ve chatted with our internal graphic design team on best practices and their go-to tips and tricks. What’s even better is I’m going to take all that fancy-art-school-design knowledge and condense it down to make sure these are steps anyone can do... even if you don’t believe you are a “designer.”
First, we’ll go over how to take great photos with your phone. We'll focus on composition, natural lighting, and we'll do a quick run through of some of the editing features I use in Instagram.
Secondly, I’ll demonstrate how to use an app called Phonto on your iPhone or Android to edit your pictures for Instagram. It’s one of my favorite apps, and you can do more than just what Instagram will let you do, in my opinion!
How To Take A Great Photo for Your Church Using Your Phone: Part 1 - Composition, Lighting, & Editing
Obviously, “great” can be rather subjective, but in the context of this post, “great” means a photo with good lighting, straight horizontals and verticals, and visual interest. With that being said, we’re going to focus on three things:
-
Light
-
Composition
-
Editing Filters

Let’s get started.
1. Light
Natural Lighting
If you’re familiar at all with photography or cinematography, you may have heard the term “Golden Hour” or “Magic Hour.” This is the optimal time — the hour after sunrise and the hour before sunset—to take the best pictures. If you’ve ever taken a photo during one of these times, you understand why! Photos during Golden Hour are gorgeous because the lighting is the best it will be all day. To find out what time the Golden Hour is where you live, check the Golden Hour Calculator. It may not always be practical to wake up early or to take pictures during sunset, but if you have the chance, I highly recommend getting photos of people or objects when you have the best natural light.
Indoor
If you’re inside your office or the church building and are needing to take a great photo, head toward a room with windows. Here is an example of a section of our Engineering room. We have plenty of natural light. Look how it illuminates the whole room!

2. Composition
Now let’s work on making sure you take your photos with clear horizontal and vertical lines. This helps with composition.
Does your phone have a grid? Good. Turn it on and align your horizon and vertical lines with it. Keep it straight. See example below? Which one looks right to you?

The photo on the left is aligned vertically, but its horizon line is off. The photo on the right has a straight aligned horizon and vertical.
Take a closer look, I put in a vertical and horizontal grid line so you can see alignment.

3. Editing Settings
Next, let's look at the filters within Instagram (IG). You can use whichever one you see fit, depending on the mood you're trying to create. True confession time: I personally don’t use the IG filters. What I do use most of the time is their editing settings. I’ll show you which ones I particularly like. Know that you don’t need to use all of them to get the best result. To demonstrate the editing settings, let's use this photo I took at Coronado Beach.
To get to the editing settings, I choose the photo I want to edit, hit "Next" inside the Instagram app, and click on the wrench icon on the lower right hand side of the screen.

ADJUST
I use this to straighten out my photo. This is great when your hands shake and the horizontal isn’t quite perfect. You can fix that here. Hit "Adjust", and move the blue bar to align your picture. I adjusted this to .80.

BRIGHTNESS

CONTRAST
This setting controls the darkest and brightest parts of your photo. Use it when you want your lights to decrease. Or, use it to bring light to the dark areas of your picture. I’ve adjusted to 7.0

SATURATION
This is like contrast, but it adjusts your brightest color and your darkest color. If you push the blue bar to the left, you'll notice your image turns to black and white. If you go the other direction, your colors will grow deeper and more vibrant. I’ve adjusted the beach photo to 10.

SHADOWS
This controls the shadows in your picture. You can use this to make your shadows darker or lighter. I’ve adjusted to 17.

SHARPEN
This basically means adjusting the contrast (brightest and darkest light) on the edges in your photos. I’ve adjusted to 12.

And now the Before and After:

You’ve got it! Taking great pictures with your phone can actually be fun when you know how to do it well. You already use Instagram for church but now you can take professional-looking photos and maximize your ministry impact, too.
Hopefully, you feel like you know how to take a great photo, and now we're going to take it a step further and learn how to create great church content!
I’ll now show you step-by-step how to make the image below using the Phonto app for the iPhone or Android.
If you would like to follow along, you can download the original photo to your phone by right clicking the image just below.
It’s worth mentioning that I didn't take this photo with a professional camera, rather I used my phone and edited it using the methods I explained earlier in this post.
Step 1: Find Your Photo
In order to follow along, you may want to go ahead and download one of your favorite photos to your phone. Below we’ve provided the photo we are using in the tutorial for you to use!
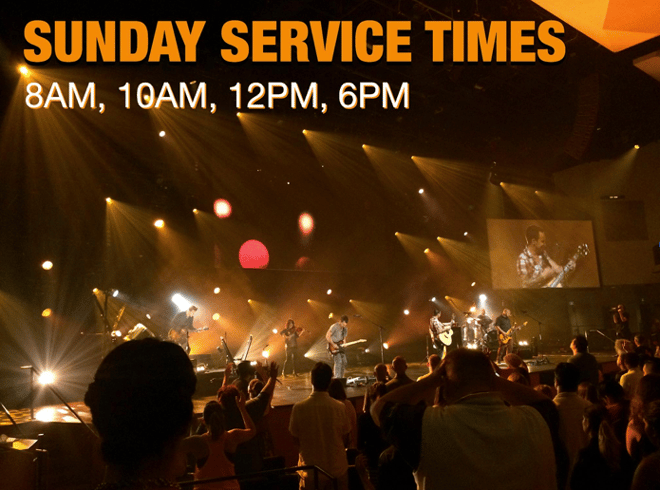
If you want to create content that advertises the service times at your church, you can use a photo of your church's worship team during an actual church service. You could also use a peaceful nature photo or one of your church building with the sun setting in the background.
No matter which photo you use, be sure that it will grab people’s attention, and if it evokes emotion, that's even better. You'll also want to find one that has a good spot to add your text.

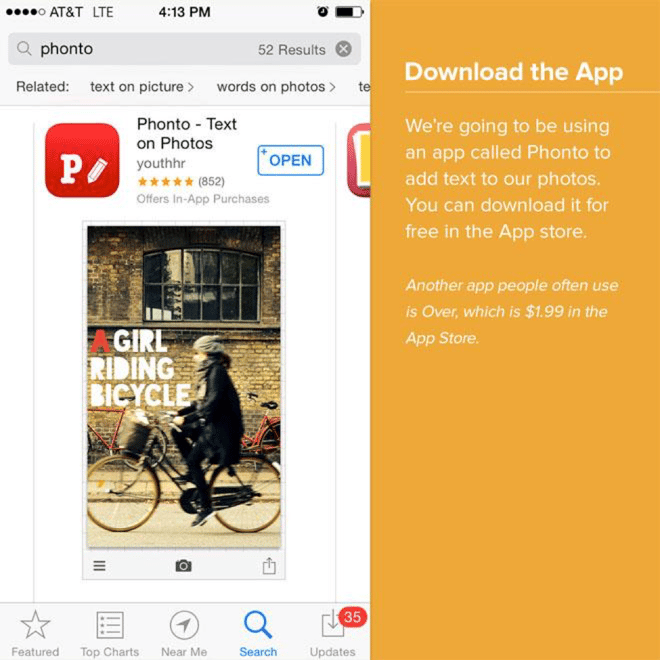
Step 2: Download Your App
Using a free app like Phonto is a great option, and if you want to use that one, then simply click on the link and download it to your phone. But if you want to explore other apps, you can also try the following text-adding apps:
- Typic
- Word Swag
- Over
- BubbleFrame
It should be noted that not all these apps are free, and most of them have a price range of $.99 to $2.99.
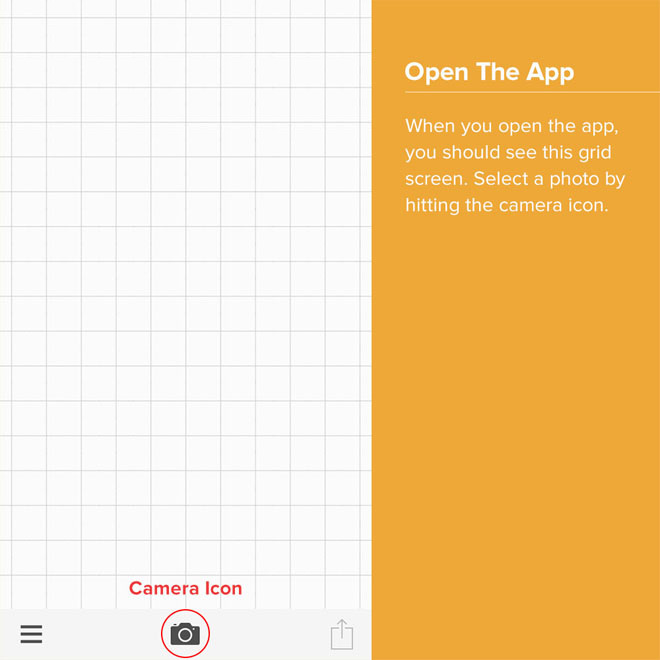
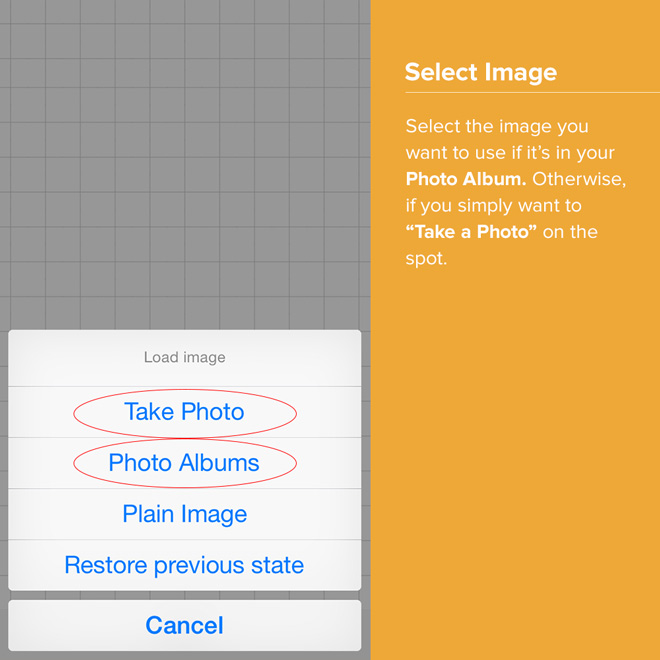
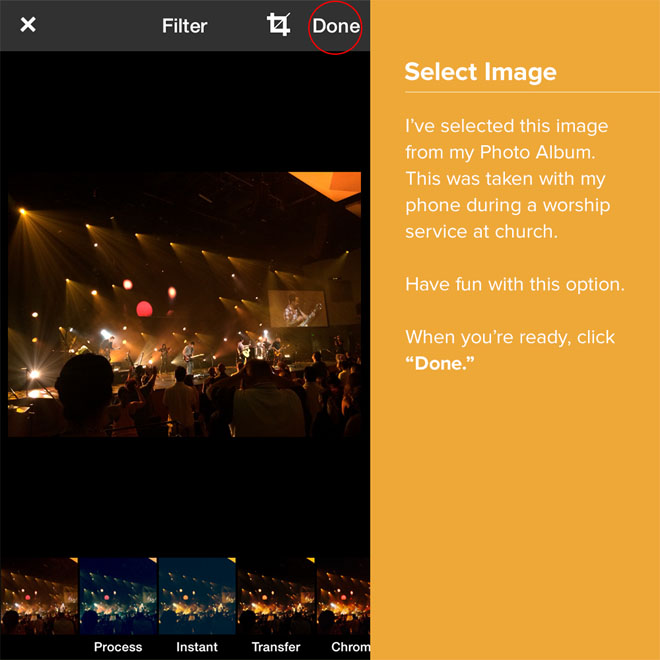
Step 3: Retrieve Your Photo
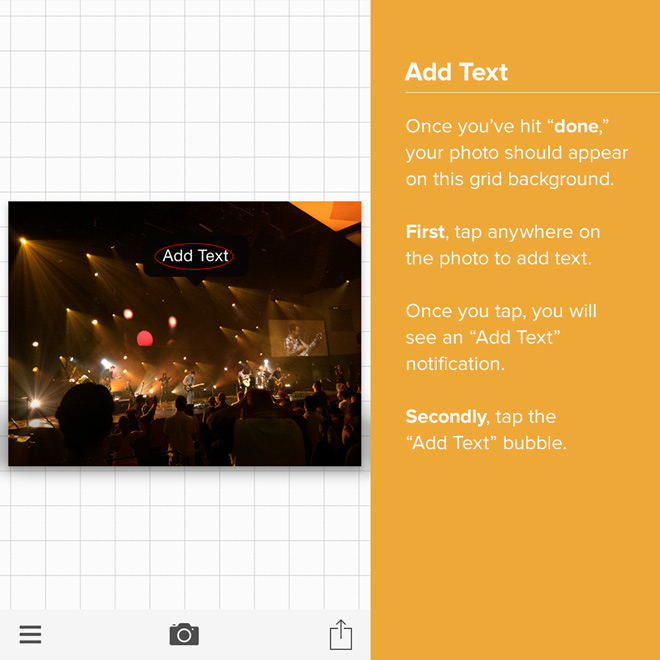
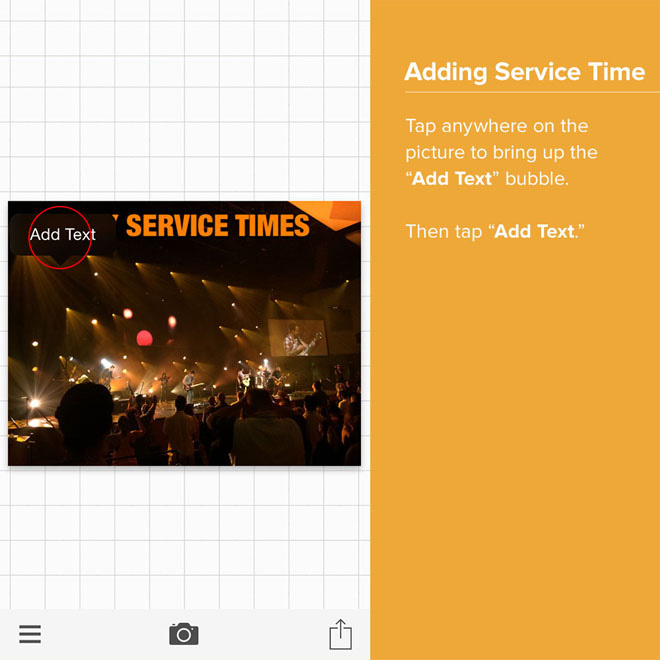
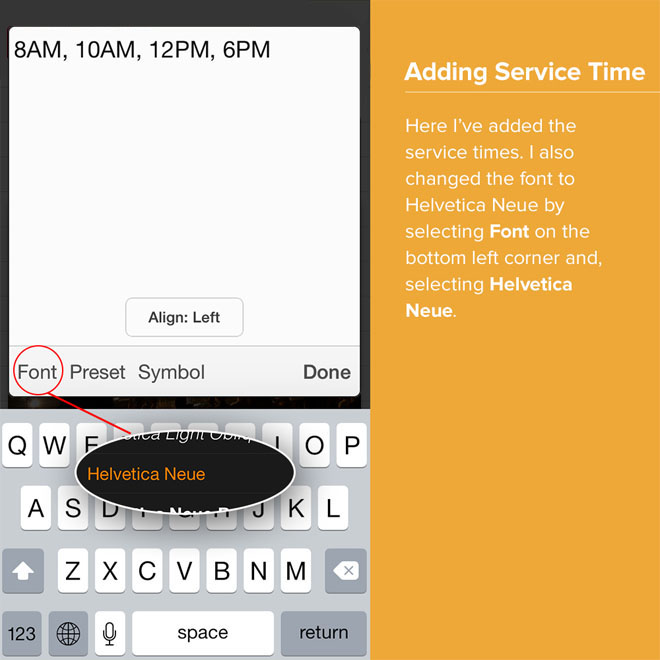
Step 4: Add Your Text
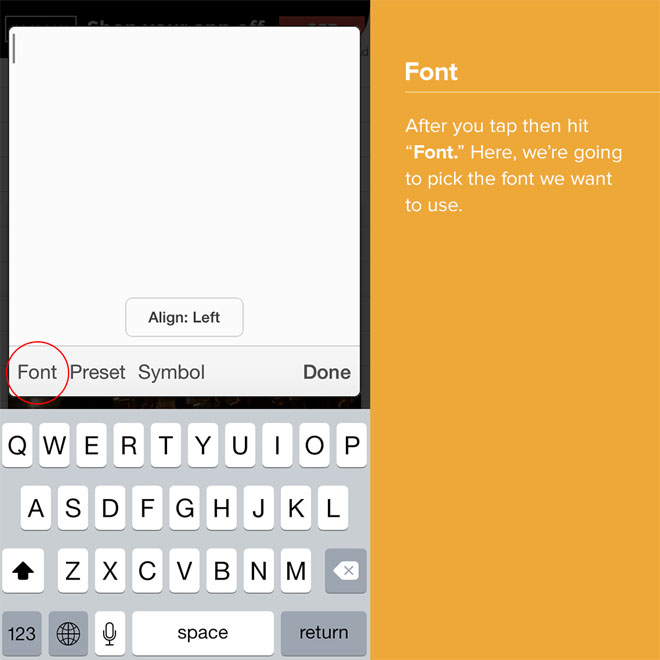
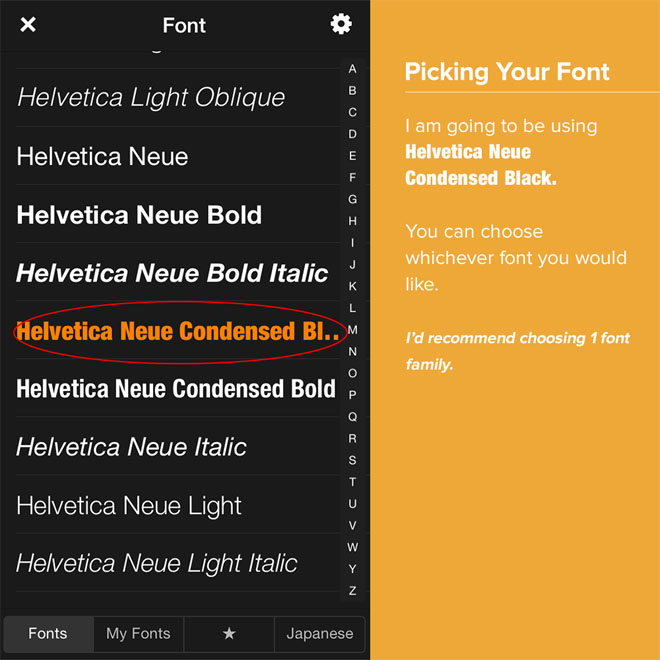
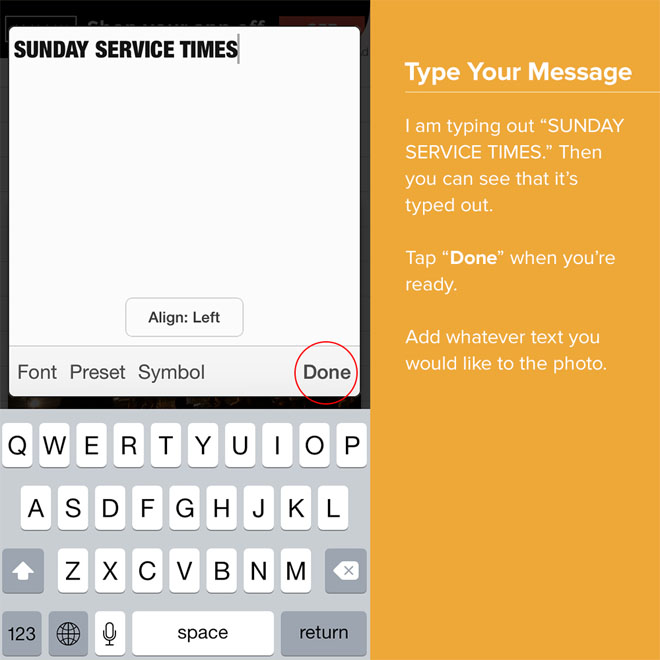
Find a good spot on your photo to add some text. This should be a blank spot, or a place that's not too busy, and that has either a really light or really dark background. Once you've found the perfect spot, tap on it and you'll see the words, "Add Text." Tap again on the "Add Text" bubble, and then hit "Font." From the list of fonts, add the one that best suits your photo. After choosing your font, type your message. Once you have quickly proofed the text, tap "Done."
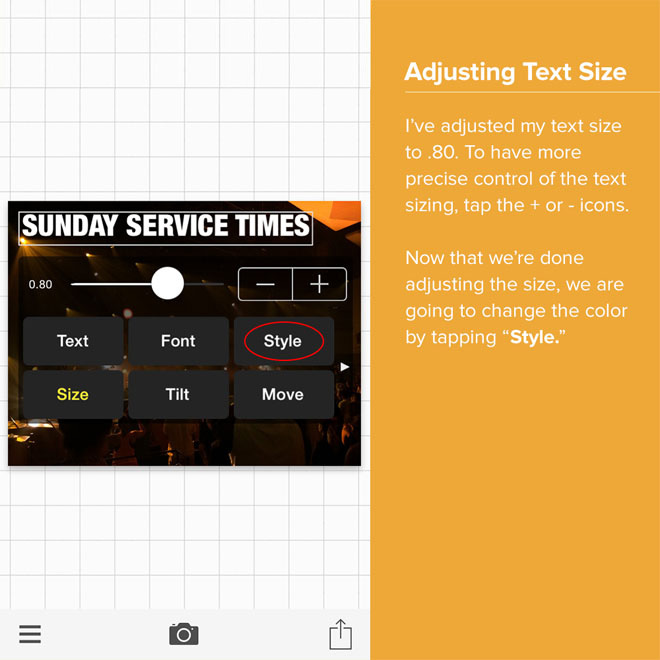
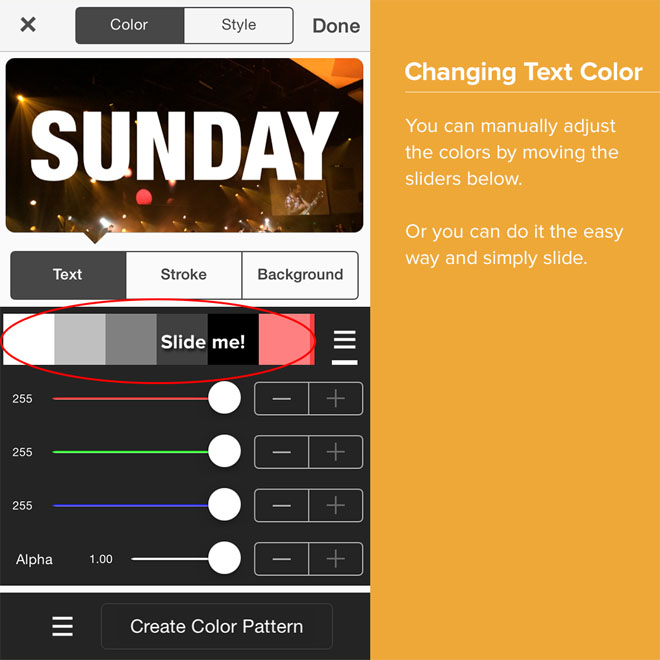
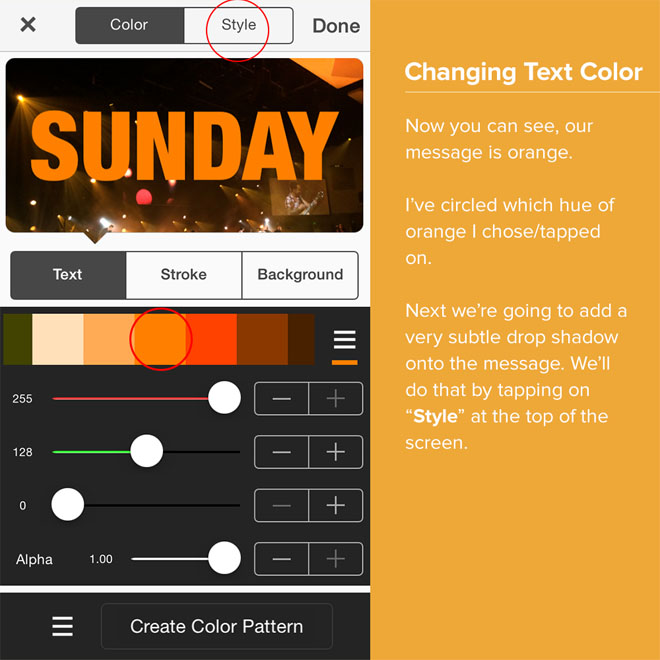
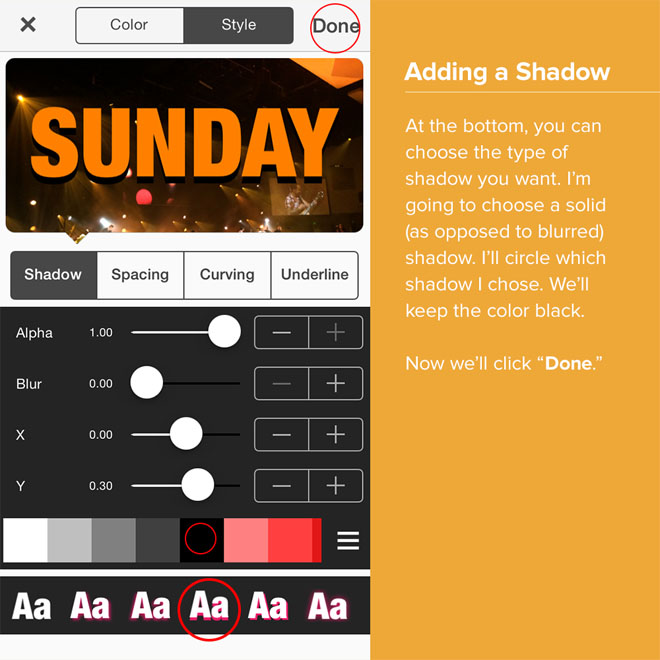
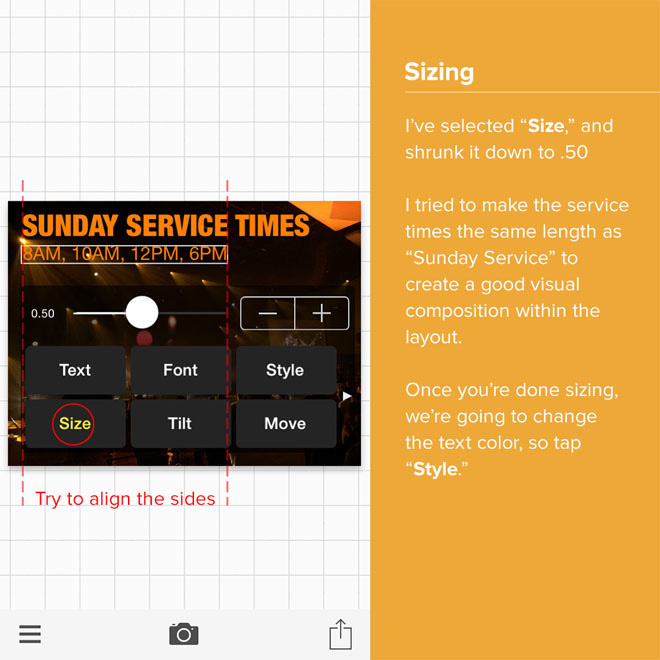
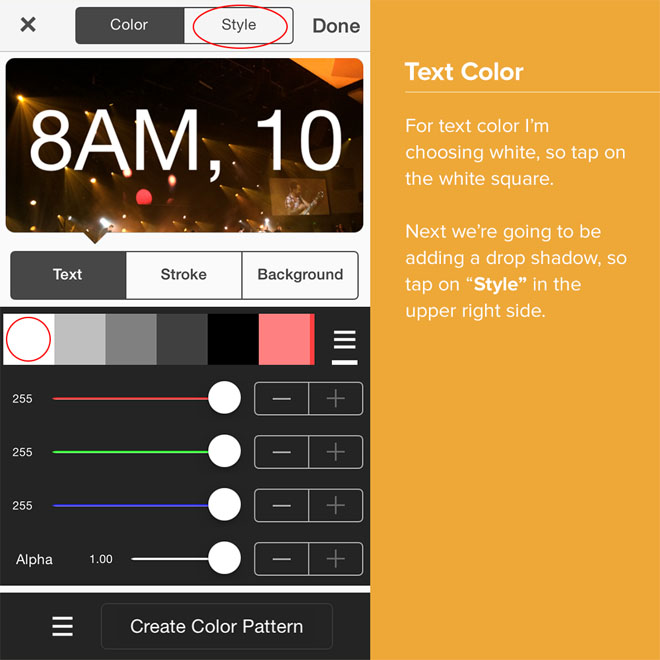
Step 5: Adjust Your Text
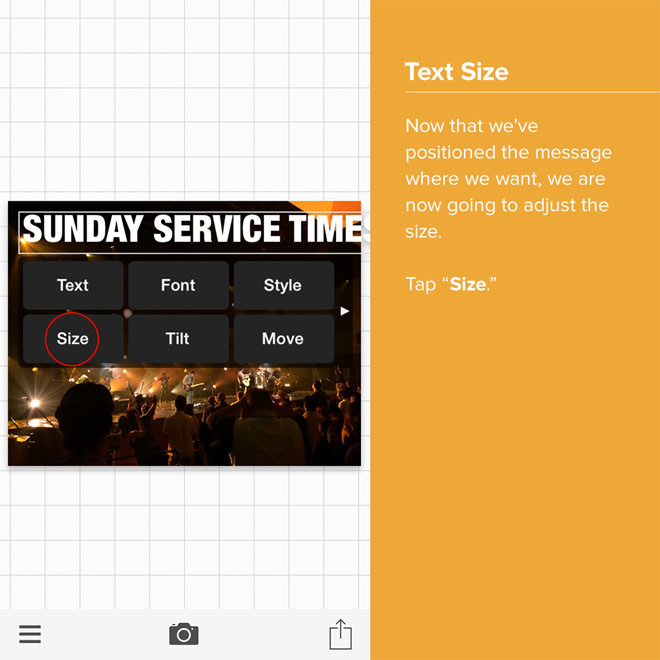
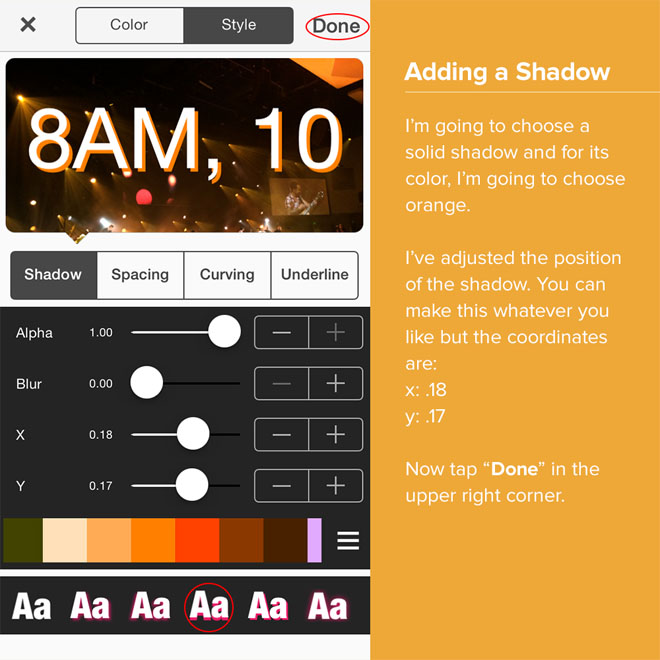
There are many things you can do to adjust the text on your photo. You can reposition the text by dragging it with your finger. You can also adjust the size of the text. When you choose the "Style" button, you can even change the text color and add shadows. Once you're happy with how the text looks, you can add more text by tapping "Add Text." You can format this text exactly the way you did your previous text. 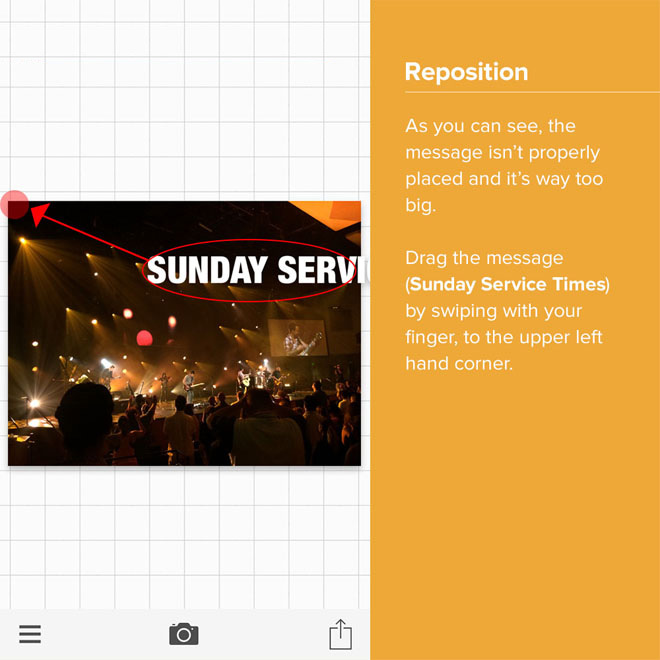
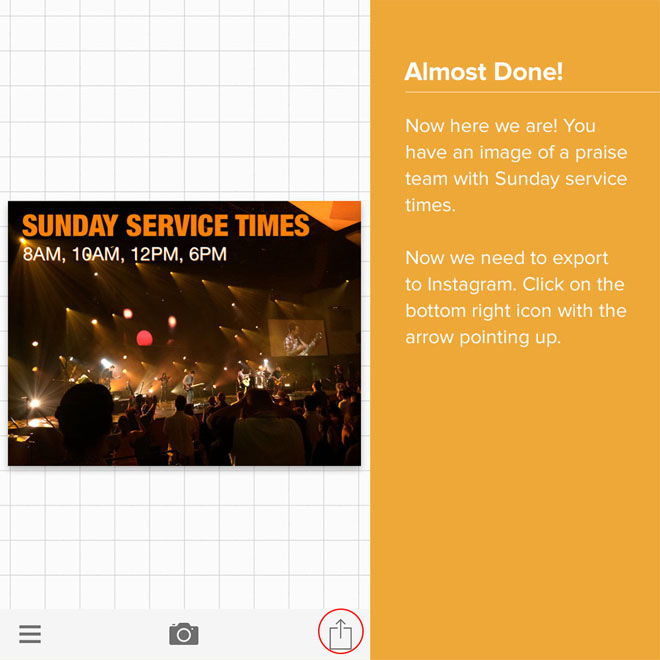
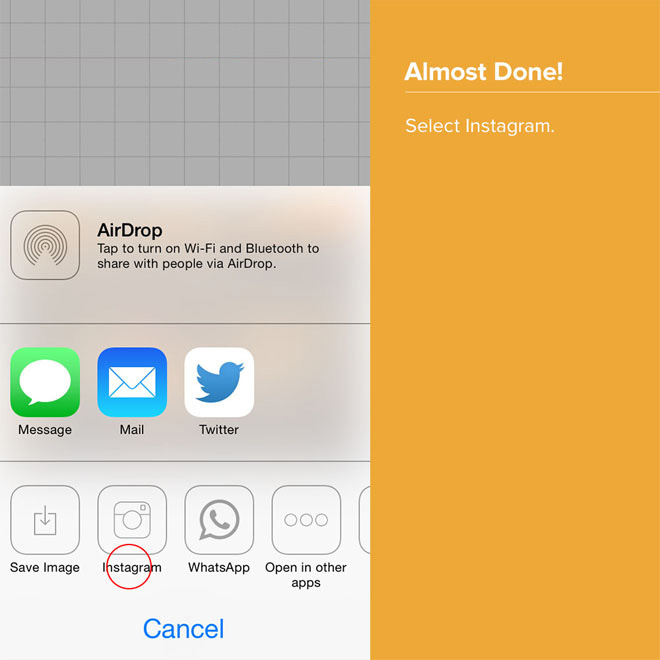
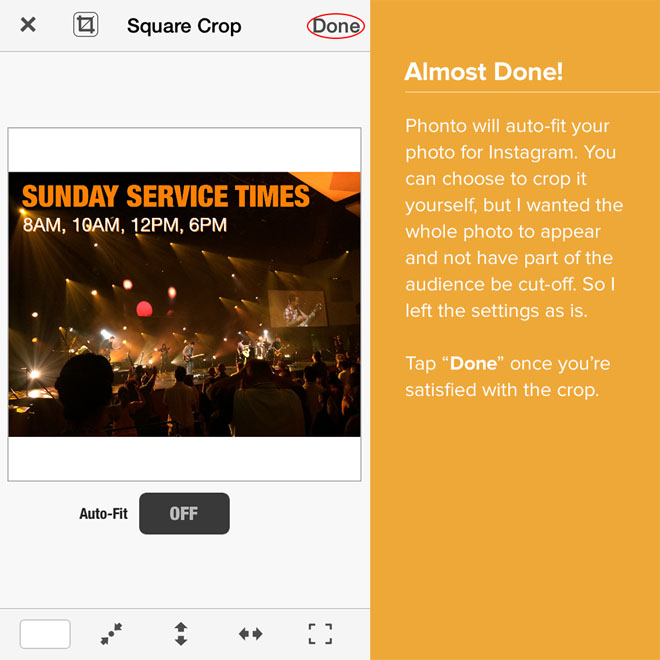
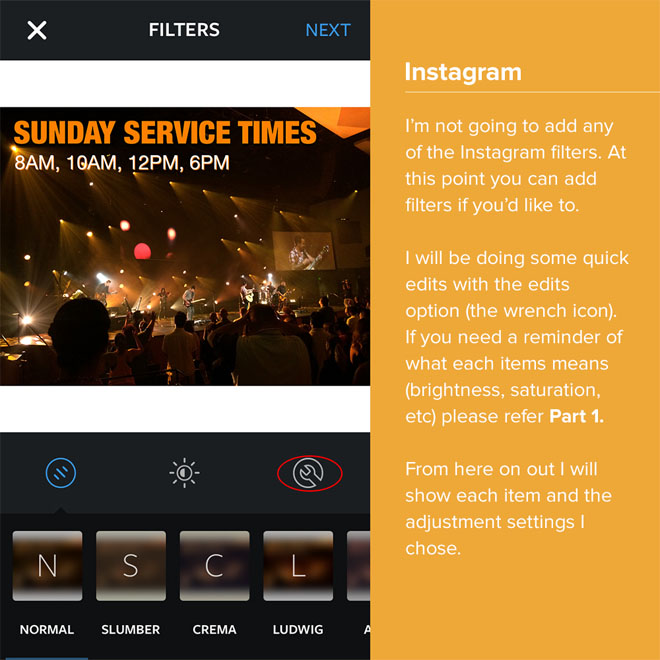
Step 6: Export to Instagram
To do this, simply click on the icon with the arrow pointing up, then select Instagram. The Phonto app will auto-fit your photograph, but if you want to, you can crop it yourself. All that is left to do is tap "Done." You can then add filters, and by clicking on the wrench icon, you can do some quick editing. Feel free to adjust the brightness, saturation, and any other edits you feel are necessary.